Friday, March 23, 2012

Grid lighting on the cheap

In this post I will briefly mention a new diy project I have recently put together. With instruction from a friend of mine I created a grid light for using with my flash. The nice part about this as well as my other project is that it cost me less than $1 to create.

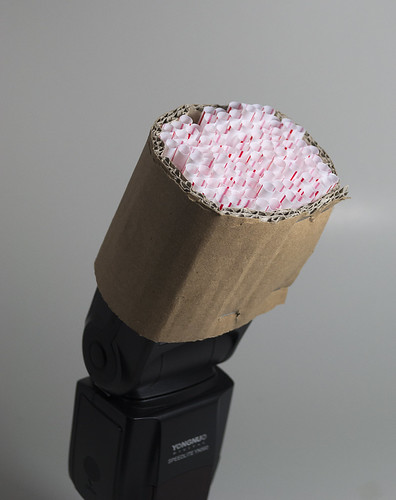
I took a piece of scrap cardboard which I wrapped around the flash and stapled together so that it would hold its shape. I then cut straws at about 1 1/4 inches to 1 1/2 inches long and shoved them into the cardboard. I put enough in such that they wont move but not too many that I am squishing the straws.


Here is a picture of this grid light on my flash:

Grid
Can be seen on Flickr Page Here


Another nice part about this is that I am able to take the grid on and off easily depending on what I want to do.


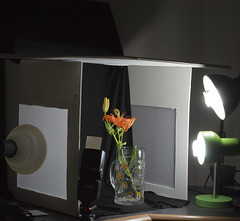
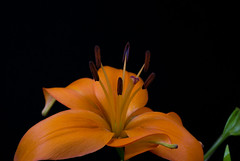
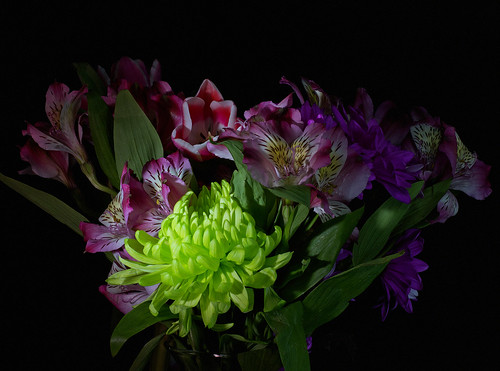
Below are two examples of pictures I took with this lighting scheme and I also used my light box which I discussed in an earlier post. First is a bouquet in which you can see the effects of the flash with the grid. A spotlight effect was created and a small portion of the bouquet was lit well while the rest of the bouquet fades into the background. In the the second photo the single flower is not big enough to have any part out of the spotlight. As I don't usually deal with larger objects, this is where I get the most use out of the grid as I can point it right at my object no longer needing to bounce the flash off something. The grid works as a diffuser as well which is another useful piece to have.

Bouquet with Grid
Can be seen on Flickr Page Here


One Flower with Grid
Can be seen on Flickr Page Here


Now there are better examples of this technique I am sure of that. However, I think this is a good starting way to show how and why you might want to create this effect. You can alter the effect by distance away from the object that the flash is along with the power of the flash. I am sure there are many other tricks that I have just not found yet, but I will share them once I figure them out.


If you have any suggestions on how to make this better please feel free to comment below.

Wednesday, March 14, 2012

New Light Box

So recently I "upgraded" my DIY Lightbox I had built a while ago. It seemed bulky before and made it hard to have good lighting. So now I have changed a few features and I figured I would mention it in this post today.


Here is a picture of this newly created box.
Lightbox set up
Can be seen on Flickr Page


First there are four walls to this box. There is a full sized foam board as the back which is vertical. Then the base is another piece of foam posterboard although you dont see it in this photo as it is covered with cloth. The base has been cut so that its length is the same as the width of the two side walls. The walls can really be any height but I made them a little shorter than the back so that I can put more lamps from the top shooting downwards. Also in each side is a 12 x 12 inch square which I taped a piece of tissue paper across to help defuse the light.

Then for this set up have a piece of black matte fabric I got on sale which is what gives me a cornerless back ground. If I were to take the fabric off I have a piece of white poster board that has a slight curve as it goes from vertical to horizontal to get rid of the back lower corner.

Lastly as can be seen here I have an extra piece of foam board going over the top. I had that there so that I could bounce the flash onto the photo.

As you can see I can light from the sides or from the top down. This was as I was finishing so the lamps are a little askew so that they could be seen easier.

I believe this whole project cost under $30 including the cloth. This makes a nice stable area for me to take pictures of different objects with different backgrounds.

Also usually I would keep some sort of diffuser infront of each one or be bouncing it off one of the walls of the box.

Here are two examples of photos i have taken in this box last night. I still need to play more with the lighting but I think this is a good cheap start for anyone.

Lily Pistil
Pistil on Flickr Page

Lily on black
Lily on Flickr Page

If you have any suggestions of comments please share.